
How to Sew a Face Mask With a Filter
Follow these simple step-by-step instructions to make a cloth face mask with a pocket insert so you can insert a removable filter.
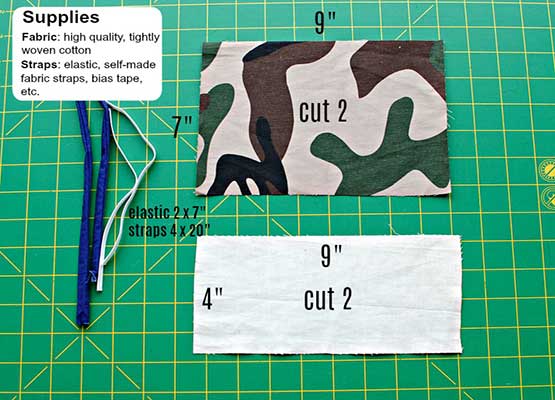
Supplies
- High-quality, tightly woven cotton fabric 1 piece of 7” x 9” fabric 1 piece of 9”x4” fabric
- Straps: for this project you can use 2”x7” elastic straps 4”x20” homemade fabric straps
- Bias tape

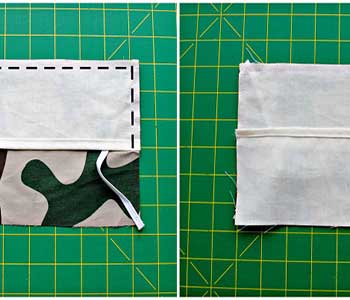
Step 1
For the back pieces, press over top 1/4″ then another 1/4″ and top stitch down. Baste stitch your preferred straps in the corners of the exterior.
Step 2
● Place one of the back pieces right sides
together with the exterior and sew (1/4″ seam
allowance).
● Add the other side, which should overlap the
other back piece about 1″ or so total. Stitch
that side down.
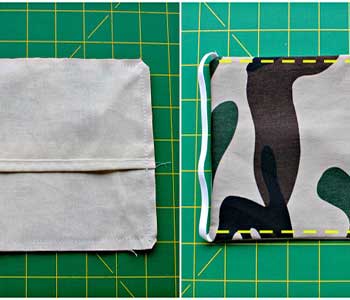
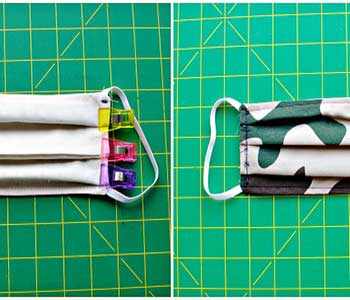
Step 3
Clip the corners and flip the right side out through the insert/pocket. Top stitch the bottom and top edges if you’d like.

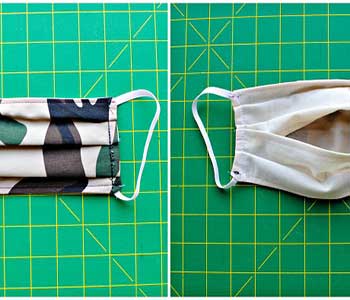
Step 4
From the back, fold the center pleat first, making sure the insert seam is flat. My pleats are usually 1/4″ or so but you can make sure they’re visually even before stitching. Stitch the center pleats first.
Step 5
Add the other folds, clip, and top stitch the sides down (1/4″ seam allowance).
Step 6
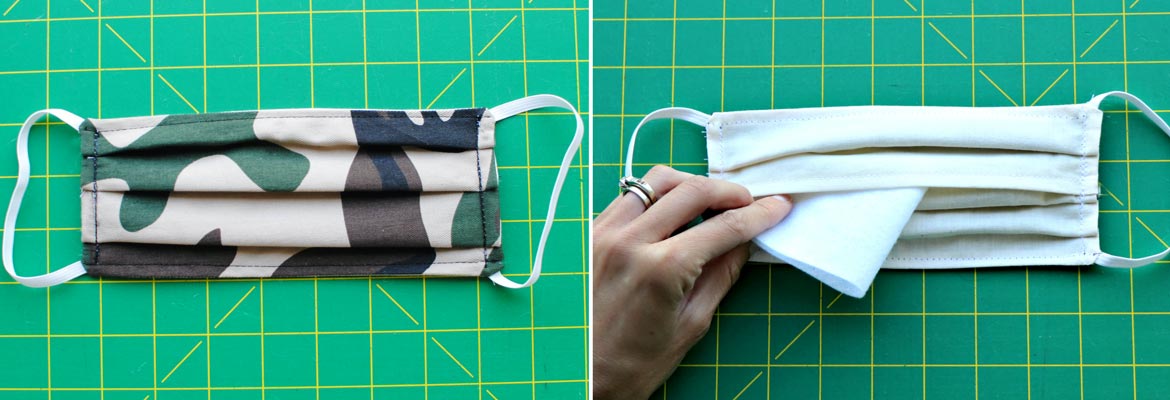
This is simple to add once you get the hang of it. Use your preferred filter material to place inside the pocket.
Finally, keep in mind that there are many options—and no right or wrong way—to create a homemade face mask. Experiment with different fabrics, colors, patterns, and materials to find the combination that works best for you. For general information on mask making, check out How to Make a DIY Mask.
Legal Disclaimers
- Cloth face masks have not been proven to provide effective protection against the spread of viruses. Visit the CDC for more information.
- Cloth face coverings should not be placed on young children under age 2, anyone who has trouble breathing, or is unconscious, incapacitated or otherwise unable to remove the mask without assistance.