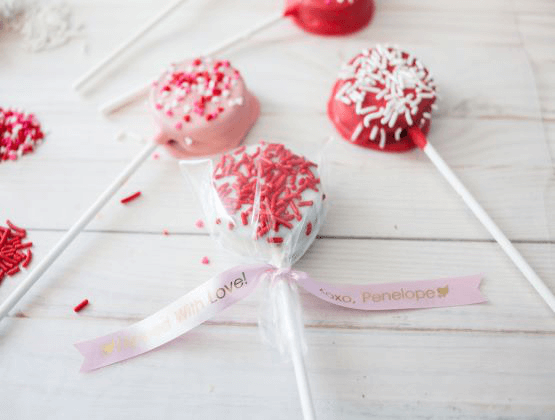
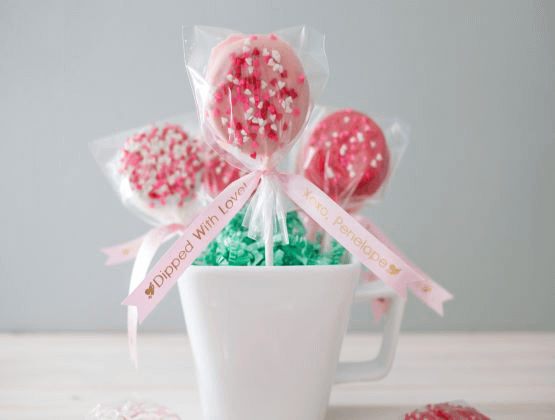
20
Valentine's cookie pops on a table with sprinkles and melted chocolate

Valentine’s Day Cookie Pops

Party favors are not just for birthdays anymore! Whether it’s a small get together or an extravagant party, nothing expresses your gratitude more than a homemade sweet treat wrapped with a personalized message. This Valentine’s Day, say how much you care with this fun and easy hand-dipped cookie pop. Your guests are going to want to grab a couple of these yummy treats on their way out so make a few extras just in case.

Supplies

  • Cookie sandwiches of your choice (we choose chocolate)
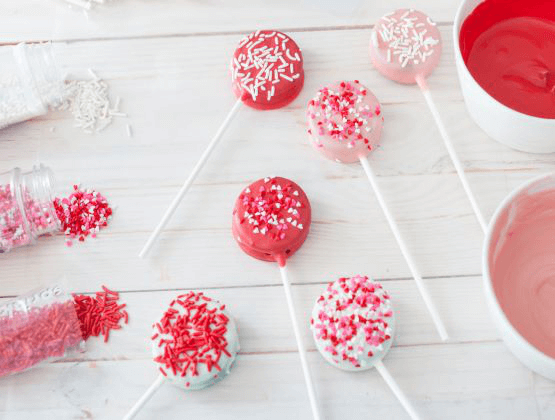
  • Bag of candy melts in red, pink and white
  • Lollipop sticks
  • Clear treat bags (make sure they will fit your cookie)
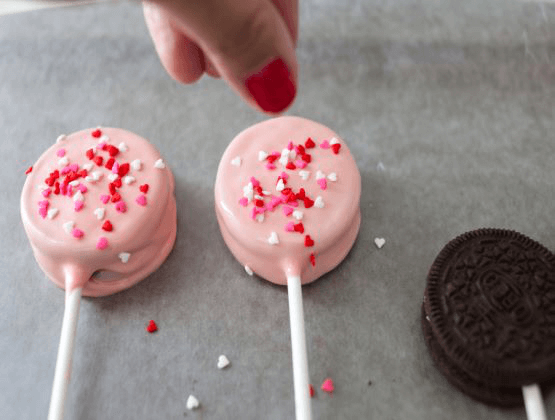
  • Assorted sprinkles
  • P-Touch Embellish (PTD215e)
  • Gold on Pink Satin Ribbon 12mm (TZERE34)


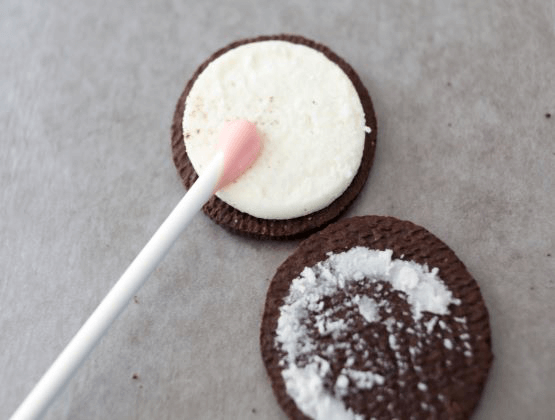
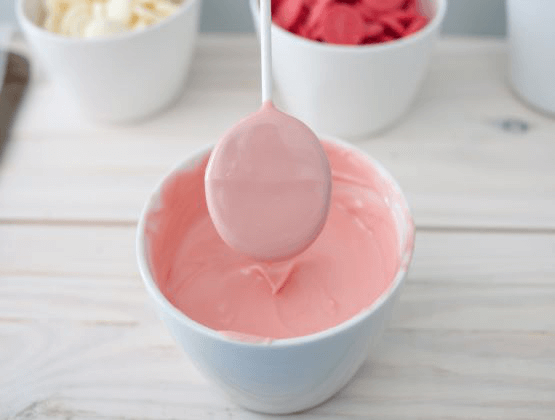
Tip: If you’ve ever worked with candy melts then you know that working quickly is essential to having perfectly smooth results.  That is why you will melt the chocolate one color at a time. Let’s start with the pink candy melt.

Directions: 

Oreo cookie separated with a lollipop stick inside.

Step 1

  • Lay out your ingredients so you won’t be scrambling for things while the melted chocolate is cooling.
  • Pour the candy melts into a microwave safe bowl. Microwave for 30 seconds then stir. Repeat this step for at least 4 times until the candy is hot and melted. Set the candy melts aside for now.
  • Twist the cookie open so that one side is covered with the crème filling and dip the lollipop stick into the candy melt and place that end of the stick into the crème filling.
  • Gently press the stick deeper in the filling to hold the lollipop stick. Sandwich the cookie back in place. The melted candy between the filling and cookie will cool and hold the stick in place

Pink candy melts in bowl with spoon

Step 2

  • Dip the entire cookie into the candy melt. Tap the stick against the bowl so the excess candy will drip off. You don’t want the cookie to be too chunky.

Dipped Oreo pops with sprinkles on lined tray

Step 3

  • Lay the dipped cookie on wax paper and add colorful sprinkles. Let the candy melt cool and harden before lifting the cookie from the wax paper.

Decorated Oreo pops on a table with sprinkles and candy melts.

Step 4

  • Now that you got the pink candy melt perfected, let’s move on to the red and white melts. Repeat Steps 1-3 for both colors.
  • Remember to add a variety of fun sprinkles to add color to your Valentine’s Day party favor.

Oreo pops with Ptouch embellish ribbon tied on the stick

Step 5

  • When the candy melts are hardened (typically 5 minutes in the fridge or 30 minutes at room temperature) you can gently lift the cookie pop off the wax paper.
  • Wrap each party favor with clear treat bags.

Valentine's Day Cookie pops with a Ptouch Embellish label in a white mug

Step 6

  • Use your P-Touch Embellish to add a personalized message select a font on the machine, type out the message. We used the message, “Dipped with Love” and “Xoxo Your Name”. Each message was flanked with the heart symbol. 
    • Press the Ribbon button on your machine and scroll to option #3. (This will give you the ability to print two different messages on each end of your ribbon) and hit OK
    • Type your first message (to add an emoji choose the Symbol button-Pictograph-Holiday-#22) but feel free to choose any emoji you like. You can also change your font from here by choosing the font button and then selecting your font, size, or style.
    • When your ready to move onto the next message hit ok and then type your next message.
    • When you are happy with your design hit OK it will now ask you for your length, we did 8.0” This gave us enough room to tie the ribbon and still see the message. If your message is longer, you maybe have to up the length.
  • Use the personalized ribbon to tie each treat bag and complete the perfect favor that is guaranteed to make your Valentine smile! 
 

Enjoy the party! Show us how you personalize your party favors using the P-Touch Embellish by tagging us on social media, @ptouchembellish .

CRAFT HACK TIPS & TRICKS:

  • Feel free to use any Font, Style or Symbols you woud like, make it personal.
  • You can add fun frames with the Frame key and scroll through till you find the perfect one.
  • Remember to always clear your machine before you start a new project or it will use the setting that you set with your last one.
  • All of the symbols and frames are shown in the included product guide.
  • You can find special characters by holing down shift and choosing any button that has red print.
  1. Estimated Retail Price may vary.
  2. See individual product page for all conditions.

X